Deploy your RShiny App on AWS Series - Lightsail
If your head is spinning over which deployment scenario to choose for your RShiny app look no further! I have a whole series planned out for you on various deployment options and why you should choose each one.
Why should you use AWS Lightsail for RShiny Deployment?
Deployment scenarios are like snowflakes. No two are exactly alike! ;-) You need different level of power and control for different deployment scenarios. Here we are going to talk about RShiny deployments, but it applies to just about everything.
Lightsail is a relatively recent addition to the whole AWS deployment ecosystem. It makes it much simpler and more streamlined to deploy a web application than some of their other, more powerful solutions.
Lightsail would be a good choice for deployment for you if:
- You don't feel comfortable deploying web applications or configuring web servers (Apache, NGINX).
- You are just fine with configuring webservers but you need something quick and easy.
- You have a smallish application and you don't anticipate large spikes in traffic.
Now, each of these points has its exceptions. For myself, I know how to configure webservers, but I still love tools that make my life easier. If I need to get a quick demo up and running, or a small application that won't live for very long, I am not going to take the time to plan out some elaborate deployment scenario with nodes that scale up and down. While that would be fun, it would also be extreme overkill.
Just as a quick note, many AWS deployment tools are elastic or auto-scaling, meaning you can scale up and down based on demand. Lightsail is meant to be very simple and does not have any elastic capability.
Reasons not to use AWS Lightsail for Deploying your RShiny App
You don't want to use Lightsail if you are anticipating large spikes in traffic. Then you will need a more powerful solution with auto-scaling capabilities. More powerful generally means more complex. Since Lightsail will create your EC2 instances you can always start off with Lightsail and then migrate as you need more power.
Create your RShiny Base Instance
The rest of this tutorial will assume that you have an AWS account.
Head on over to the AWS Lightsail homepage.
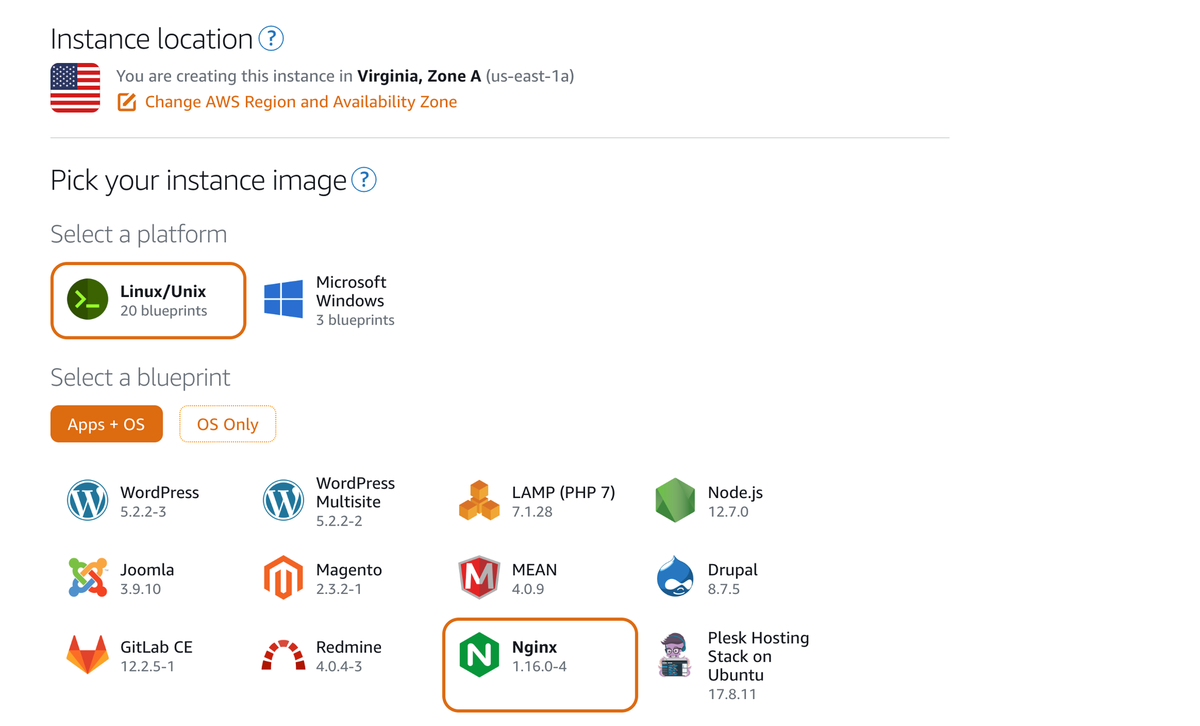
Choose your instance location and instance type. I would suggest choosing NGINX to future proof your life. It may be unnecessary depending on the setup you're going for, but I like it. More about NGINX vs no NGINX later!
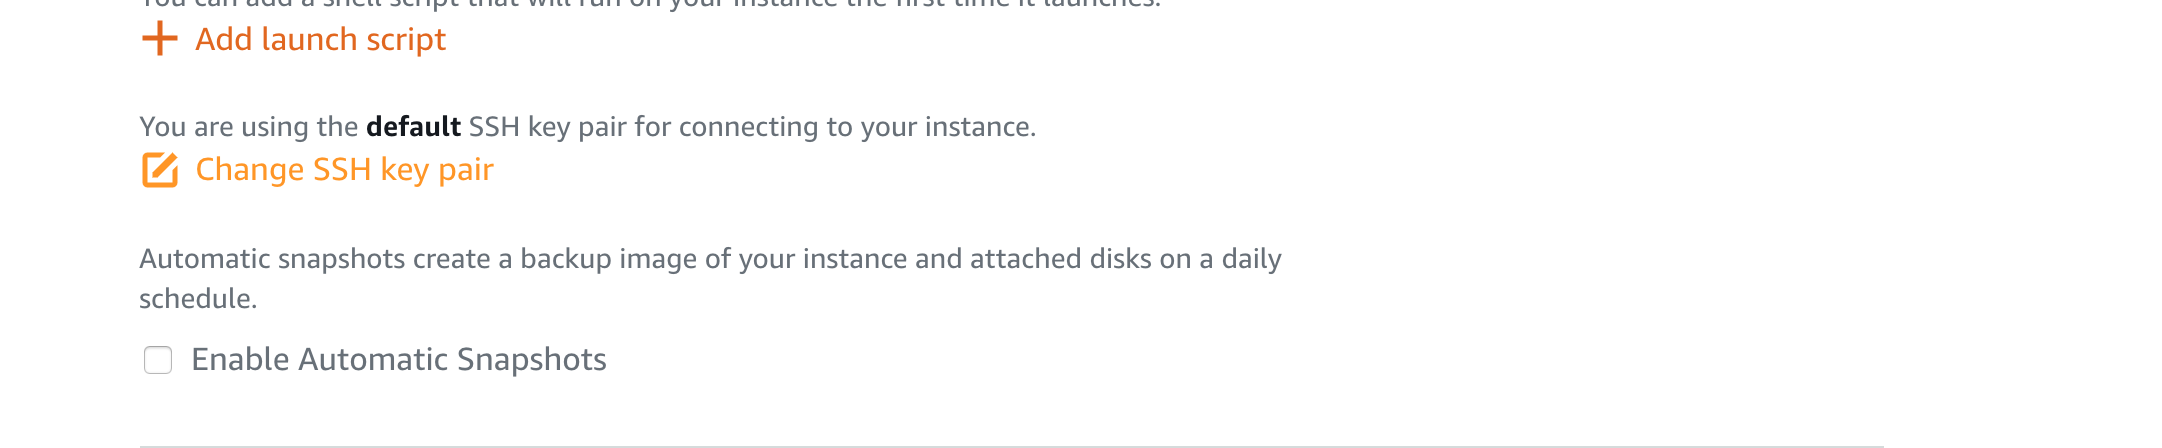
Next click on Change SSH key pair in order to download your SSH key pair. I know its odd wording, but just click on it.
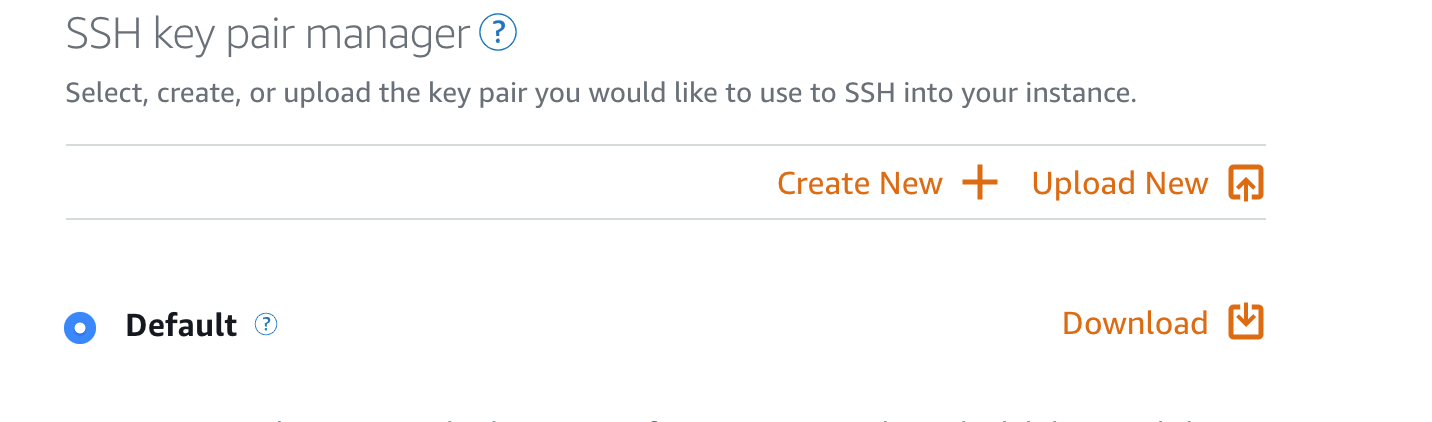
Once you've clicked on it you will have the option to change the key pair or download the default. Choose one of those scenarios and make sure to save it!
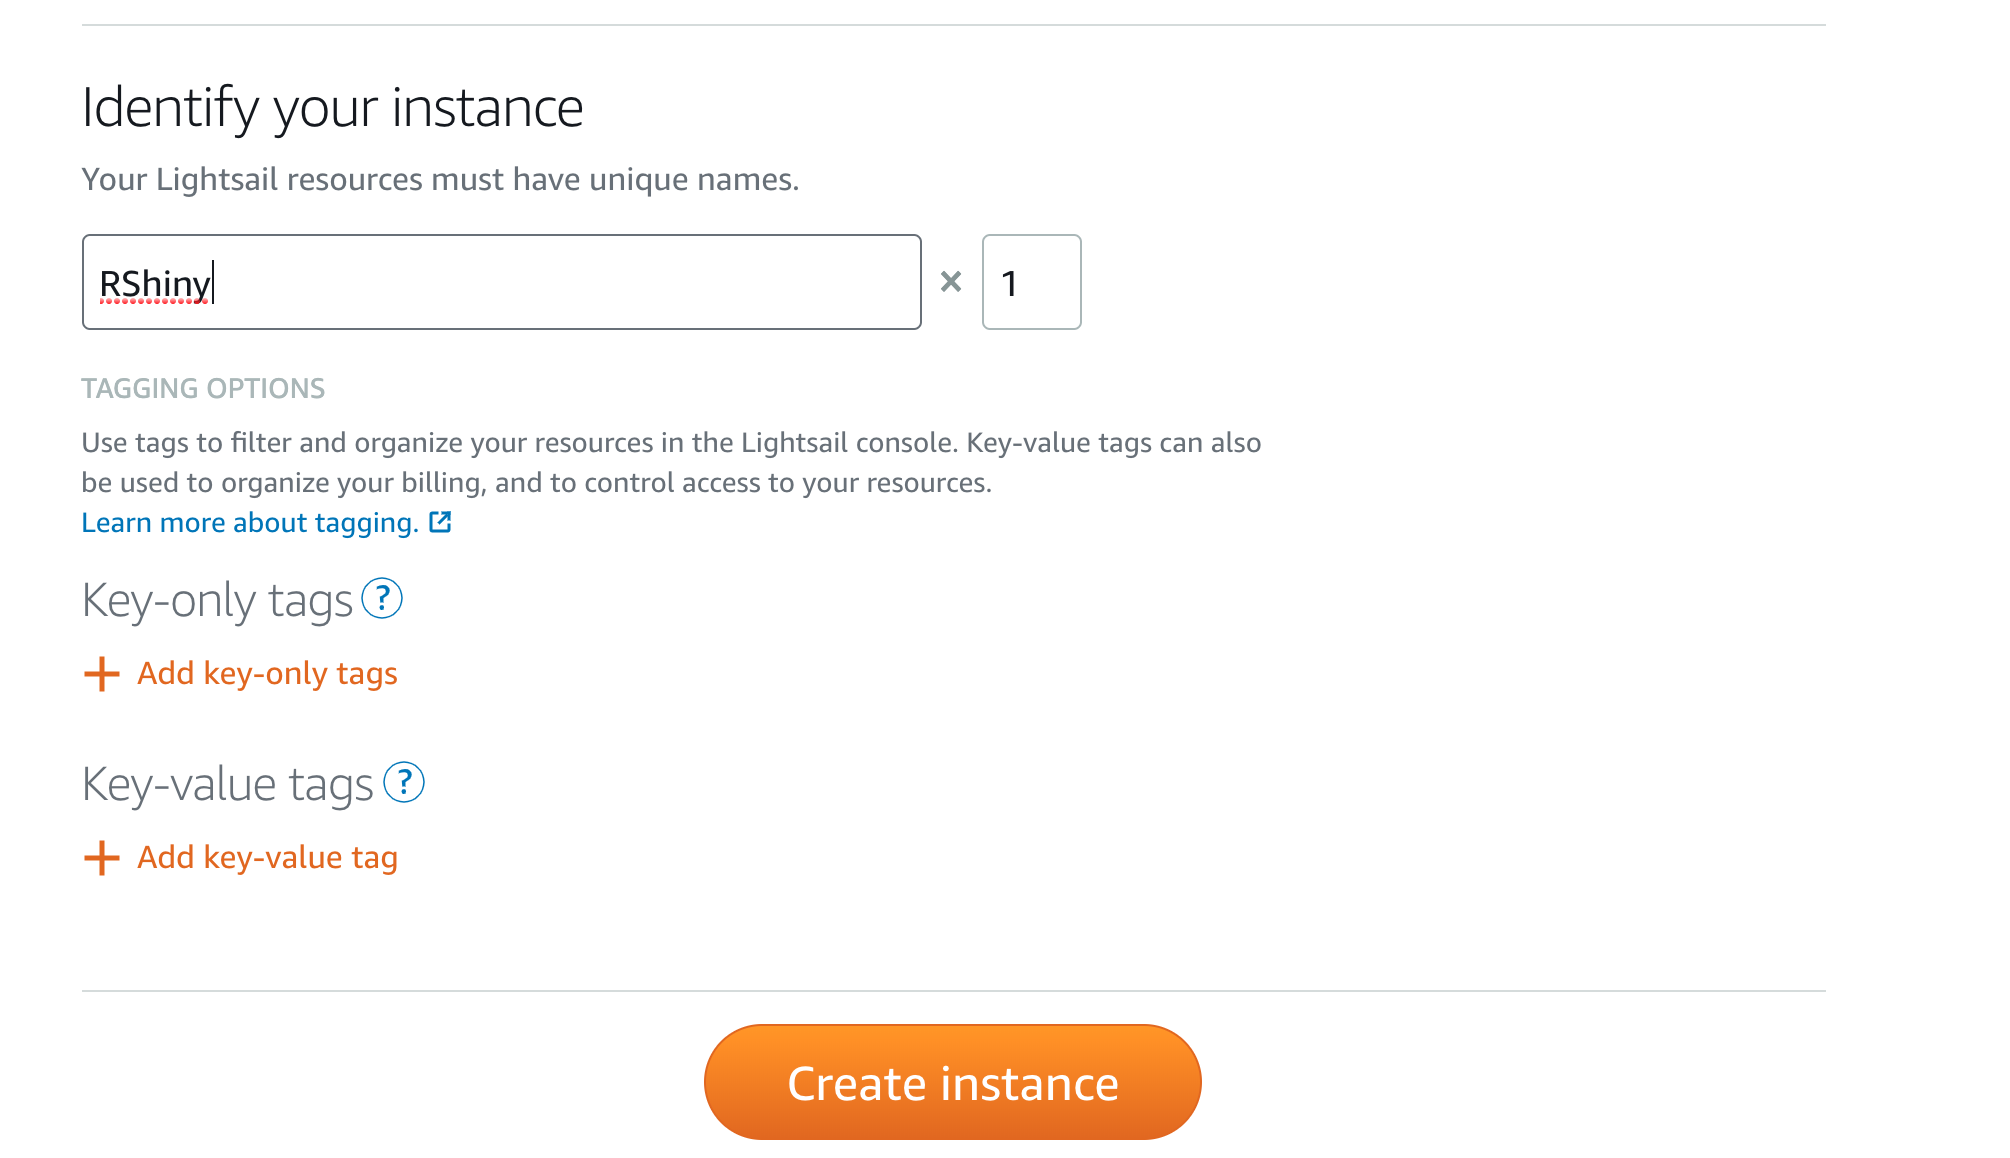
Finally, give your instance a name and click 'Create Instance'.
Now that you have your instance ready we can move onto the next part, which is actually running RShiny!
Connect to your RShiny Instance
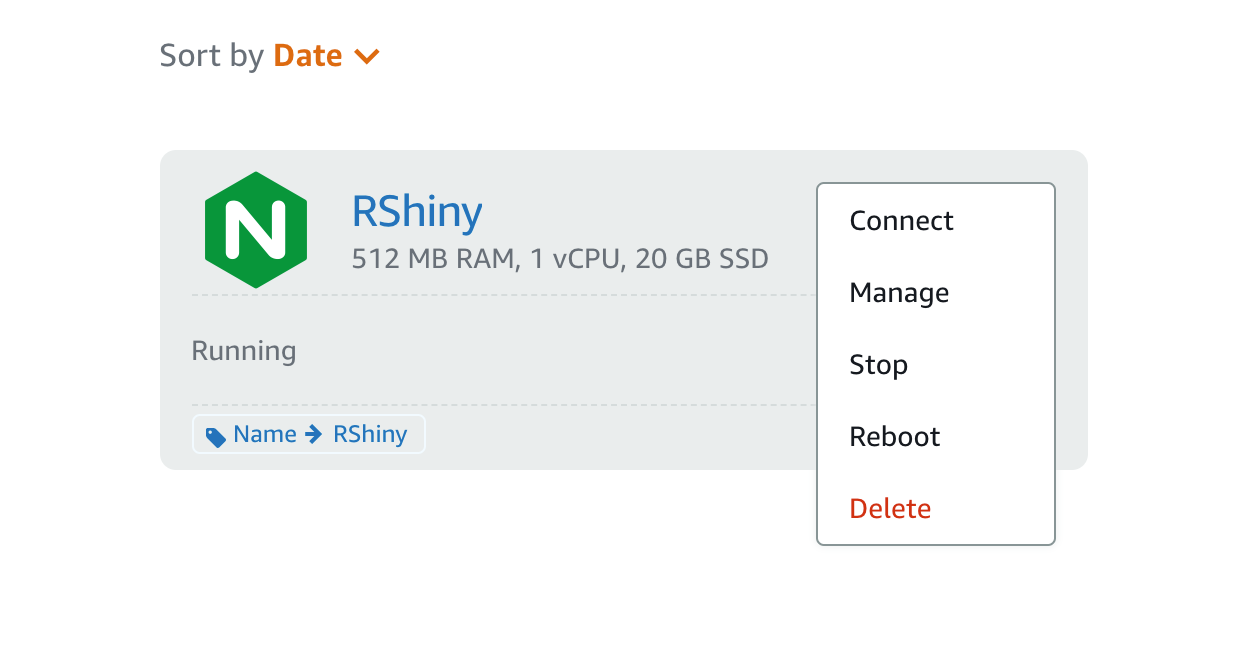
Click on the top left to get back to the AWS Lightsail home. From there you will have a list of instances. Find the instance you created earlier. Mine is named RShiny.
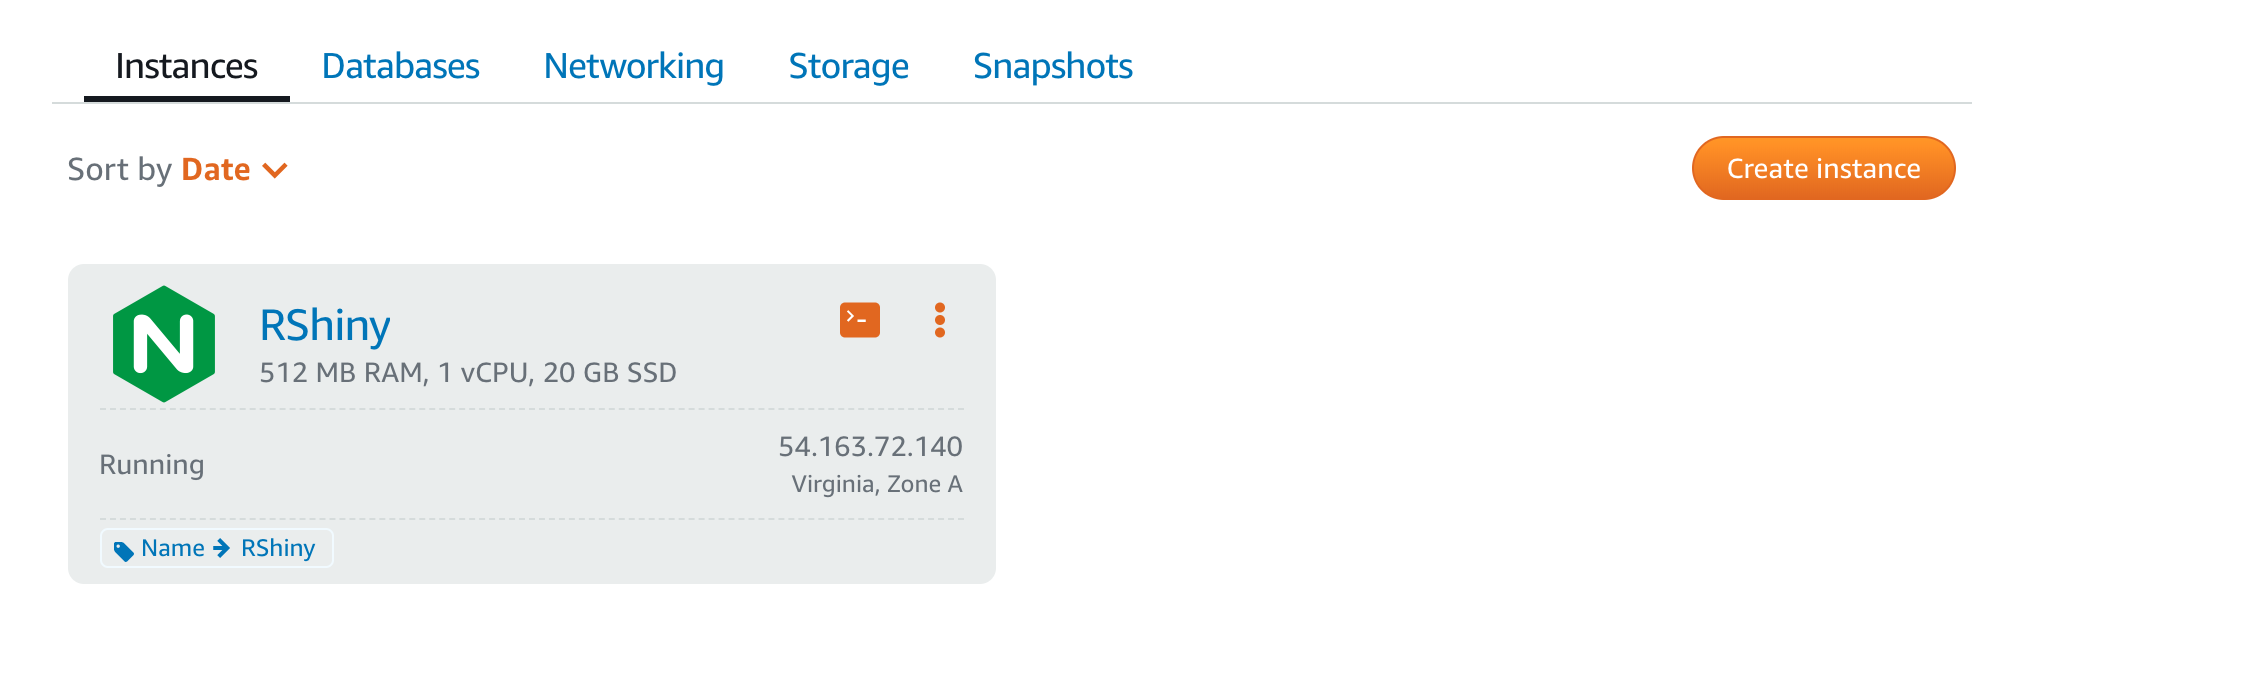
Connect using the web interface
You can actually click on the 3 vertical orange dots and then click connect, which gets you a terminal in a web browser. Pretty neat! Just press Connect and your browser will launch a terminal.
Connect using a Terminal
You can also just connect using a terminal, which is what I tend to do. I'm very picky about my hot keys! In the second row of that box it should say 'Running' on the left hand side and have an IP address on the right. The IP address is your public IP address.
chmod 600 ~/.ssh/LightsailDefaultKey-us-east-1.pem
ssh -i ~/.ssh/LightsailDefaultKey-us-east-1.pem [email protected]
Make sure you use your ssh key and the IP address of your instance. I always move mine from downloads to ~/.ssh.
Install RShiny and Run an Example
Now, I install pretty much all of my scientific software with conda. If you have another installation method, go for it. As long as you get it installed you are all set!
wget https://repo.anaconda.com/miniconda/Miniconda3-latest-Linux-x86_64.sh
chmod 777 *sh
./Miniconda3-latest-Linux-x86_64.sh -b
export PATH=$HOME/miniconda3/bin:$PATH
# Conda forge has sooooo many packages
conda config --add channels conda-forge
# Create a conda environment called r-shiny and install the package r-shiny (add whatever packages you want here too)
conda create -y -n r-shiny r-shiny
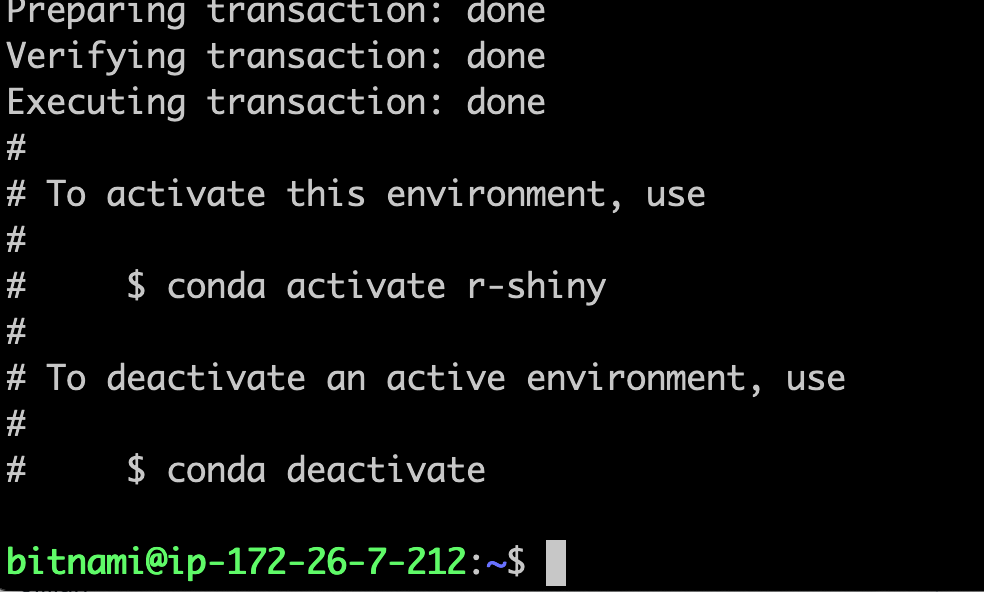
Once all that's done you should see something like this. Now, if you installed Miniconda3 using the -b you won't have the correct shell alias to run conda activate. Use the old source activate syntax instead and you'll be fine.
source activate r-shiny
That's it. Now we are ready to start playing with some code!
Start with an Example
Even if you have a real-world app all ready and waiting I always recommend that you start with the simplest scenario. Then, when things go wrong you have some idea of where they went wrong!
This code is primarily taken from the shiny-examples github repo.
#!/usr/bin/env Rscript
library(shiny)

# Define UI for app that draws a histogram ----
ui <- fluidPage(

  # App title ----
  titlePanel("Hello Shiny!"),

  # Sidebar layout with input and output definitions ----
  sidebarLayout(

    # Sidebar panel for inputs ----
    sidebarPanel(

      # Input: Slider for the number of bins ----
      sliderInput(inputId = "bins",
                  label = "Number of bins:",
                  min = 1,
                  max = 50,
                  value = 30)

    ),

    # Main panel for displaying outputs ----
    mainPanel(

      # Output: Histogram ----
      plotOutput(outputId = "distPlot")

    )
  )
)

# Define server logic required to draw a histogram ----
server <- function(input, output) {

  # Histogram of the Old Faithful Geyser Data ----
  # with requested number of bins
  # This expression that generates a histogram is wrapped in a call
  # to renderPlot to indicate that:
  #
  # 1. It is "reactive" and therefore should be automatically
  #    re-executed when inputs (input$bins) change
  # 2. Its output type is a plot
  output$distPlot <- renderPlot({

    x    <- faithful$waiting
    bins <- seq(min(x), max(x), length.out = input$bins + 1)

    hist(x, breaks = bins, col = "#75AADB", border = "white",
         xlab = "Waiting time to next eruption (in mins)",
         main = "Histogram of waiting times")

    })

}
# If you want to automatically reload the app when your codebase changes - should be turned off in production
options(shiny.autoreload = TRUE)
options(shiny.host = '0.0.0.0')
options(shiny.port = 8080)
# Create Shiny app ----
shinyApp(ui = ui, server = server)
I created a folder ~/rshiny-app/ and pasted this code into app.R. chmod 777 your app.R file and run it!

Open the Ports
If you go to your public IP address on port 8080 it won't work, which can be hugely frustrating if you're not used to AWS locking down ports by default.
What you want to do is go to your Lightsail homepage and click on those 3 vertical orange dots on the top right hander corner. Then click Manage.

Once there click on Networking.
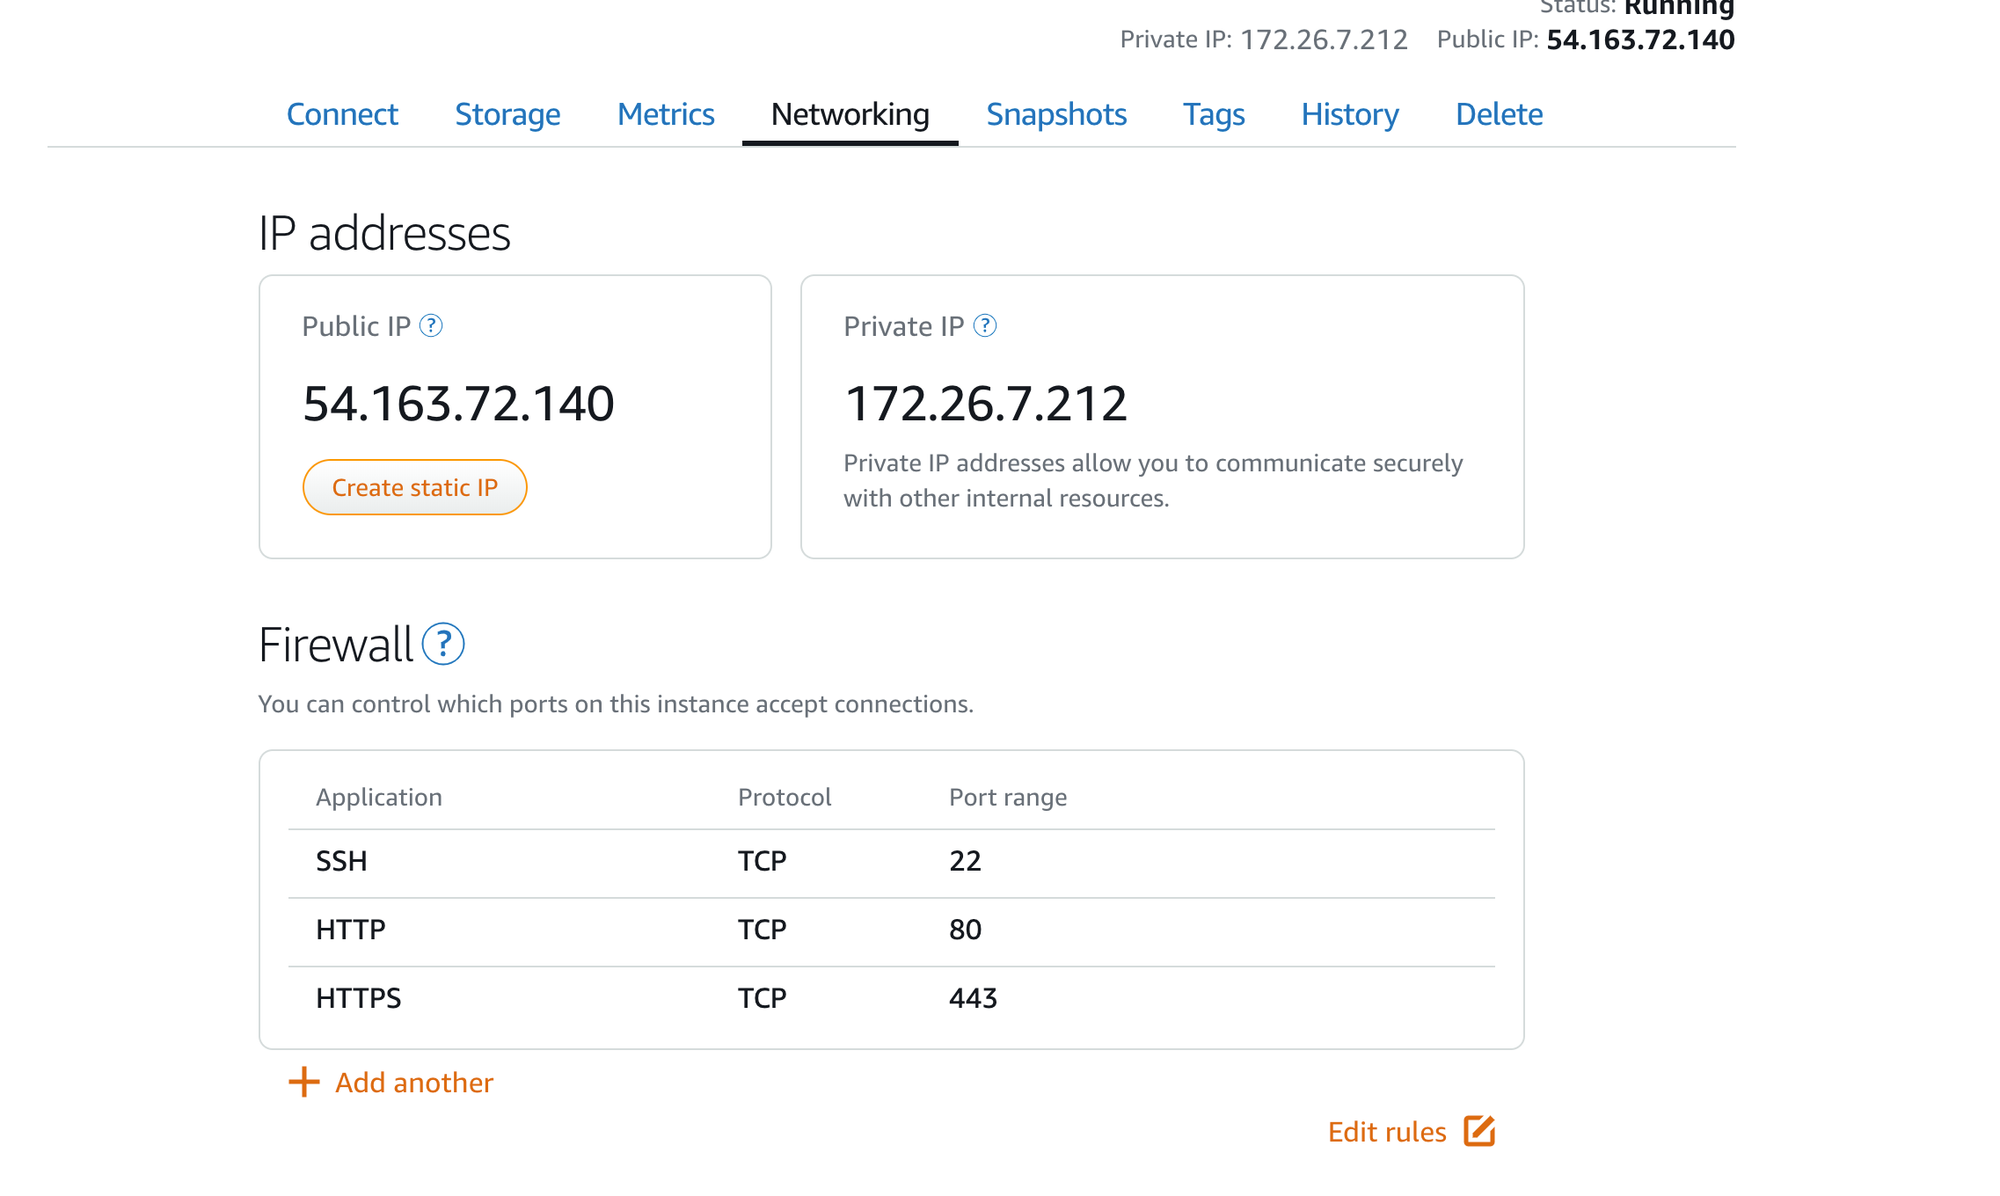
Under Firewall click Add another and add in port 8080. Make sure to click Save!
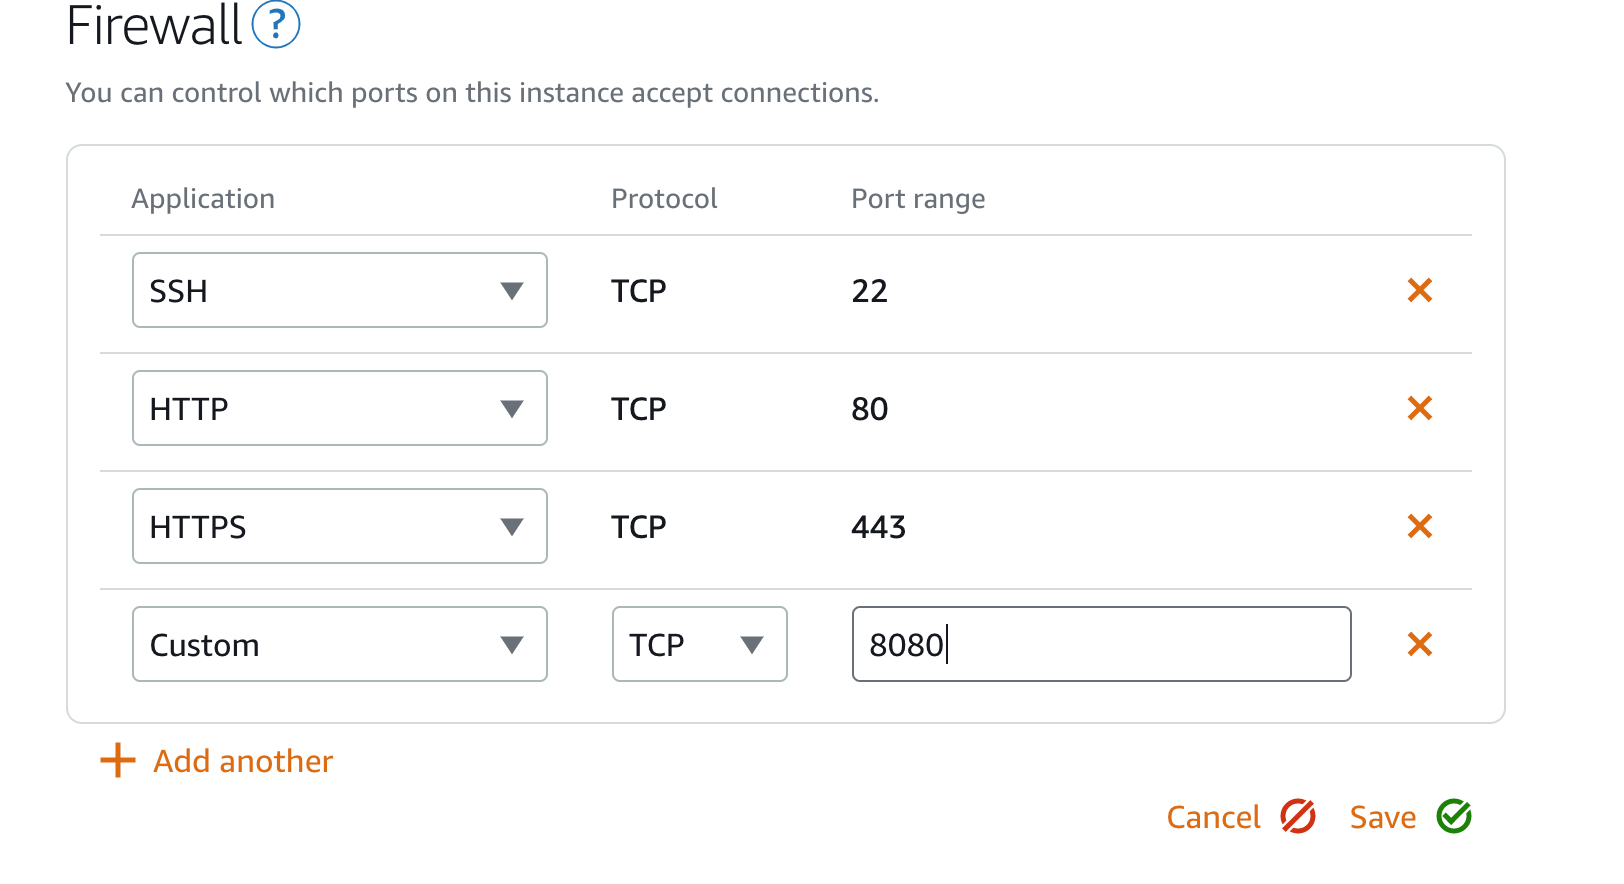
Give it a few seconds and then go to the public-ip:8080.
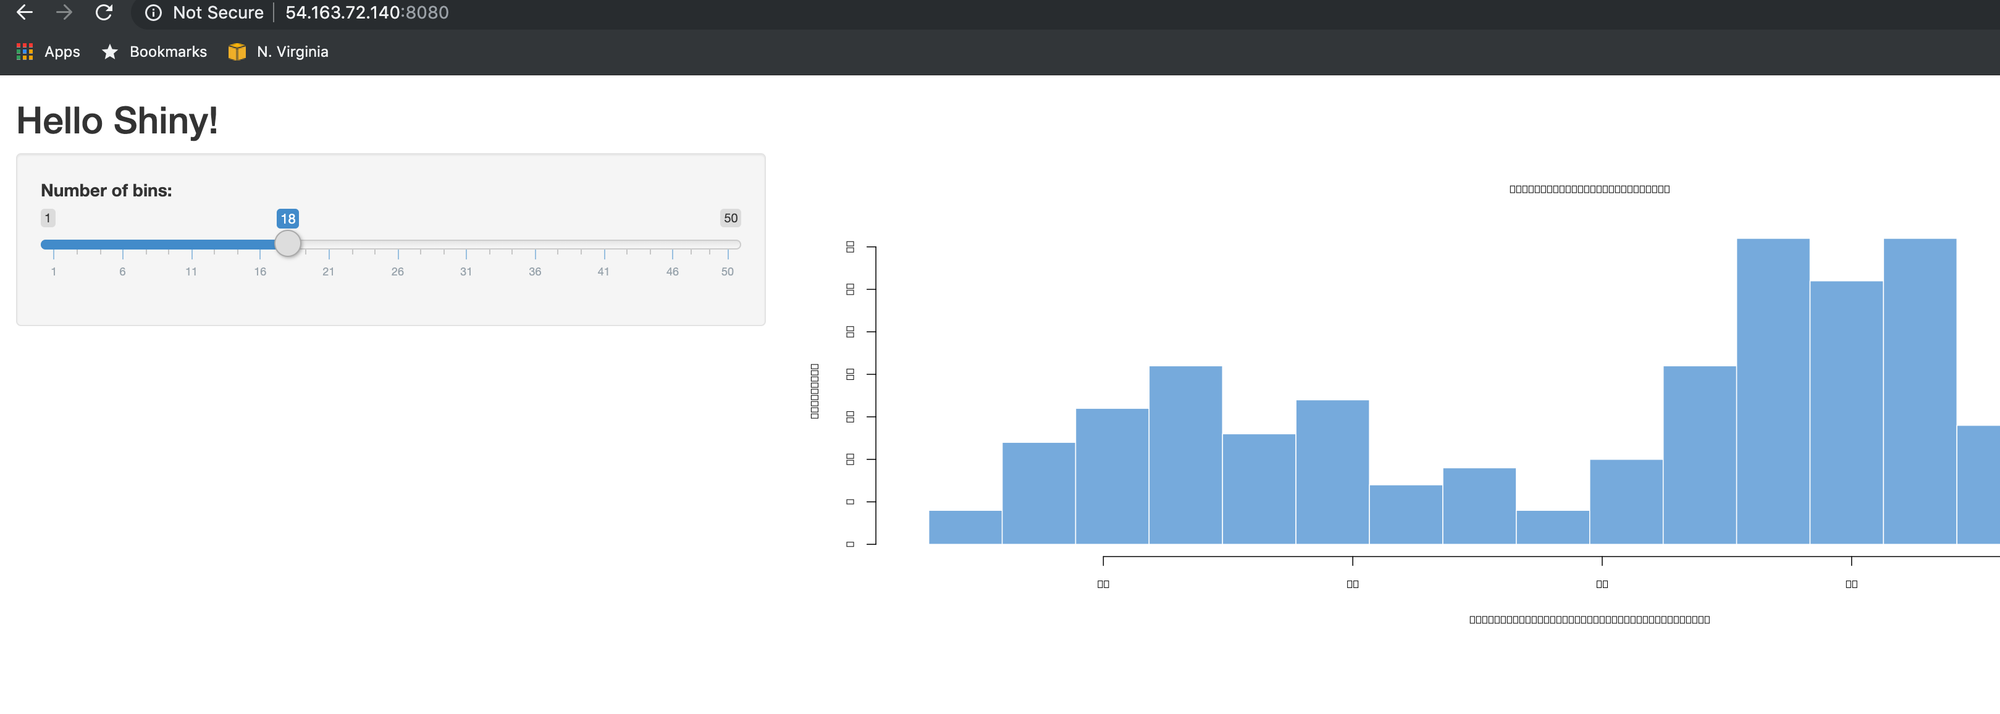
You should see your RShiny instance up and running!
Next Steps
The next steps of this tutorial are completely optional depending on your needs. If I was deploying a demo, or even a very small application for internal use, I would probably just stop it here.
Run your app under a process manager with PM2
If you haven't ever used a process manager before it is very much what it sounds like. A process manager is a wrapper around your apps, in this case, our app.R RShiny application. It takes care of starting, stopping, logging, etc.
My favorite process manager of all time is pm2. It was initially written for Node.js applications, but it really works for everything. I've used it for bash scripts (ya, I know), perl, python, and R as well as Node.js apps.
As a quick aside I think it's very beneficial to learn a few tools that can be used across multiple deployment scenarios. I know RShiny has its own deployment strategy, but I really don't want to have to learn a new method for each and every application type. I deploy a lot of applications, and that is just not a reasonable goal for me. Instead, I know how to use a handful of different tools, mostly pm2 and NGINX, in order to run my web applications. (Ok I'm done with me and my opinions now!)
Ctrl / Cmd + C in order to kill your app.R.
conda install -y nodejs
npm install -g pm2
pm2 start --name rshiny-example-app app.R --interpreter="Rscript"

If you run pm2 logs name-of-app you will see your logs
pm2 logs rshiny-example-app

You can do a lot of other fun stuff, even clustering your application to run multiple instances, and creating startup scripts. PM2 can even detect what system you are on and create a startup script accordingly!
Serve your App with NGINX
Once we've got our RShiny app running all nicely under our process manager its time to serve it with NGINX.
The ultimate authority (as far as I know) to configuring your RShiny app under various webservers is here. I'm only going over a single NGINX scenario here.
sudo su -
#Or nano or whatever you want
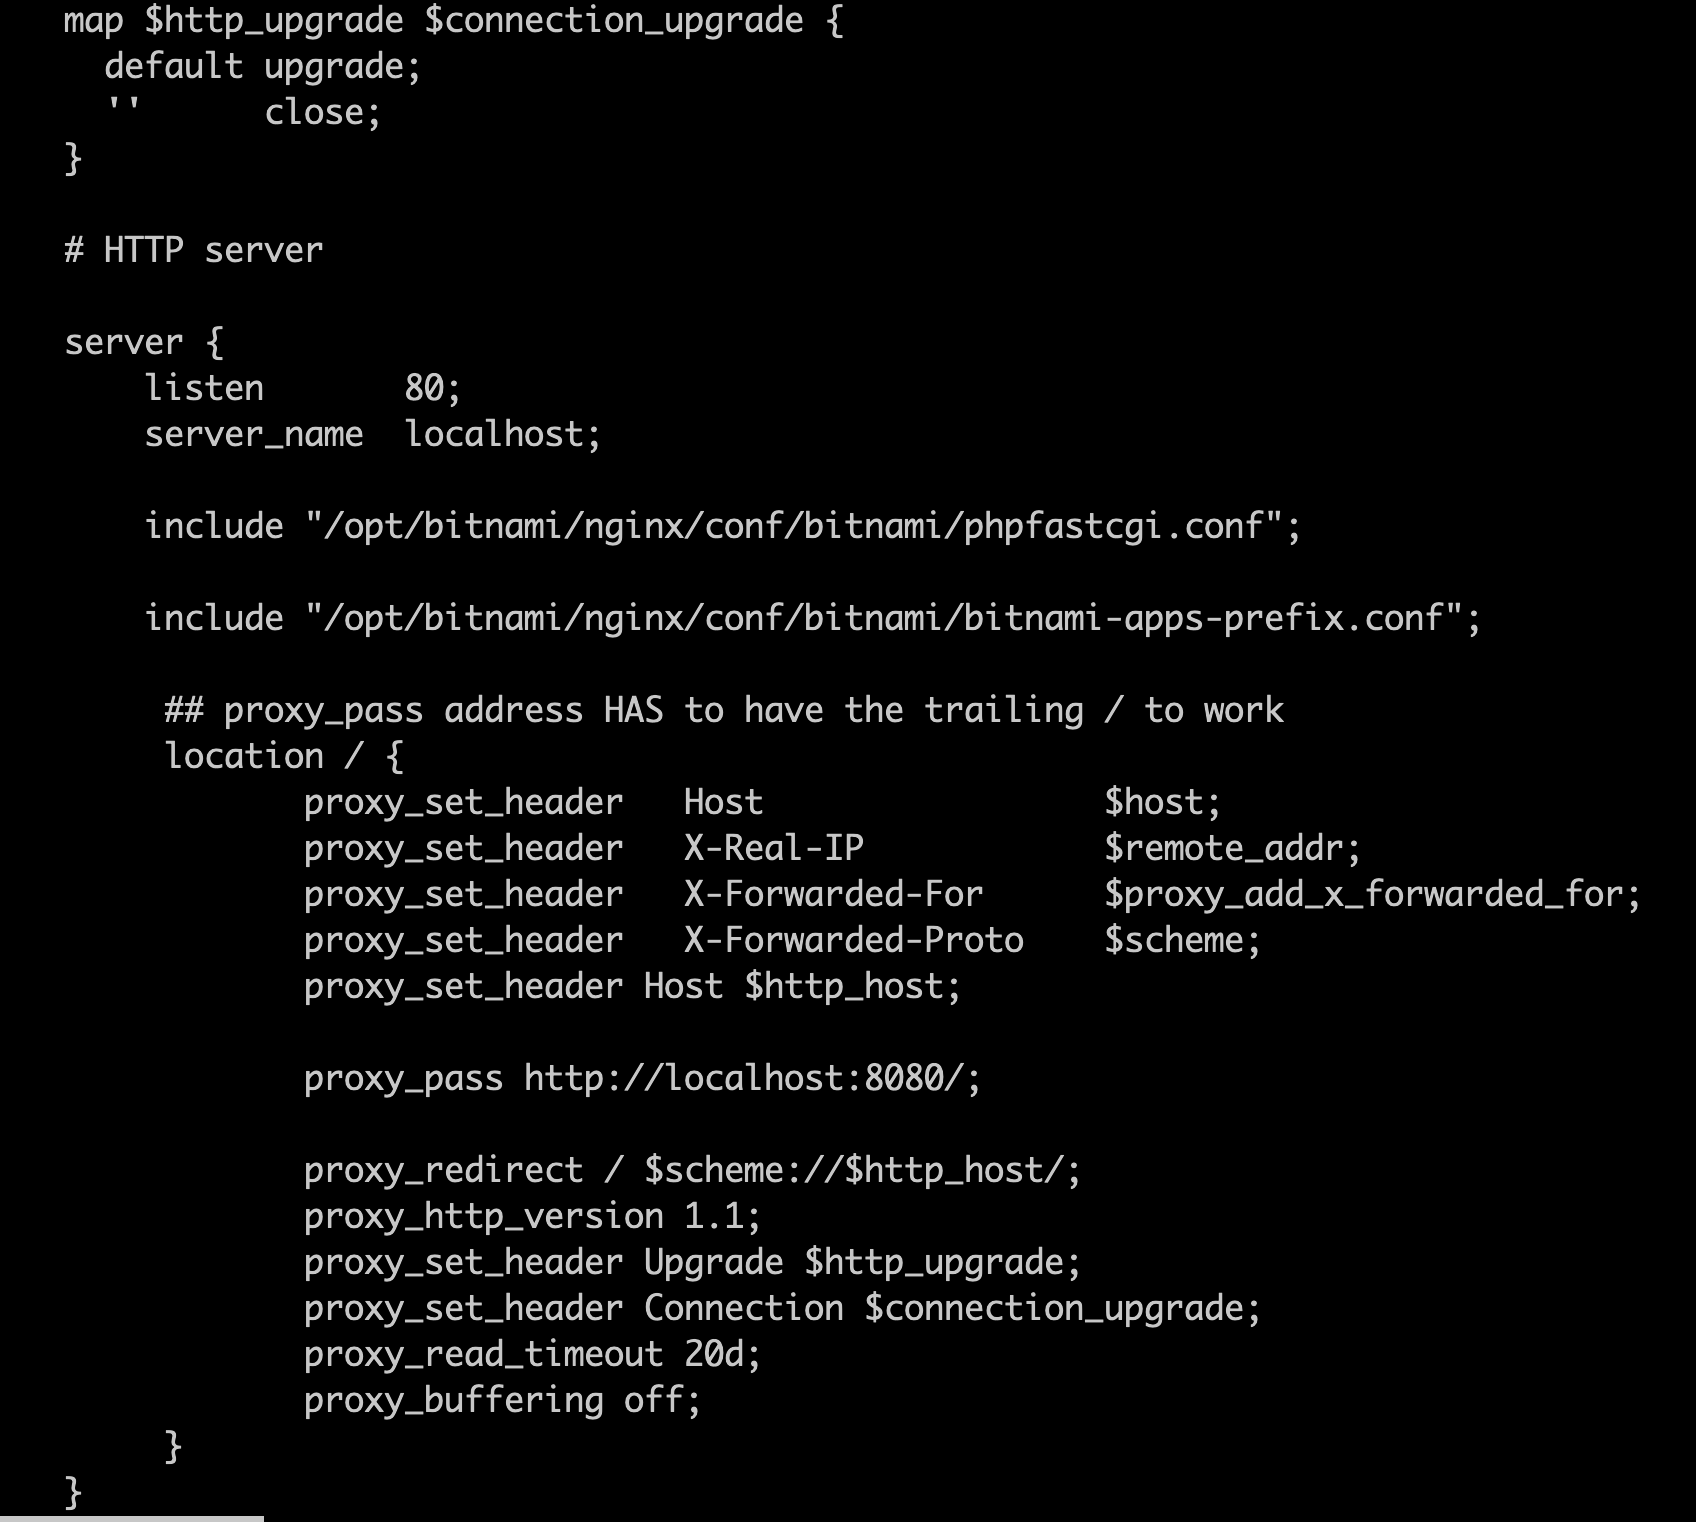
vi /opt/bitnami/nginx/conf/bitnami/bitnami.conf
Right above the server block put in this code
    map $http_upgrade $connection_upgrade {
      default upgrade;
      ''      close;
    }
Then, inside your server block, put the following location block:
     location / {
        proxy_set_header   Host                 $host;
        proxy_set_header   X-Real-IP            $remote_addr;
        proxy_set_header   X-Forwarded-For      $proxy_add_x_forwarded_for;
        proxy_set_header   X-Forwarded-Proto    $scheme;
        proxy_set_header Host $http_host;

        proxy_pass http://localhost:8080/;

            proxy_redirect / $scheme://$http_host/;
            proxy_http_version 1.1;
            proxy_set_header Upgrade $http_upgrade;
            proxy_set_header Connection $connection_upgrade;
            proxy_read_timeout 20d;
            proxy_buffering off;
     }
This is what it looks like all together.
Restart the bitnami nginx service.
/opt/bitnami/ctlscript.sh restart nginx
Go to your public IP address without the port and you will see your Shiny App!
WrapUp
That's it for this post! In the upcoming posts in this series, I will go over how to use more sophisticated deployment methods for RShiny, including EC2, using AutoScaling Groups, Swarm, and Kubernetes.