Deploy a Celery Job Queue With Docker – Part 1 Develop
Overview
In this post I will hopefully show you how to organize a large docker-compose project, specifically a project related to a job queue. In this instance we will use Celery, but hopefully you can see how the concepts relate to any project with a job queue, or just a large number of moving pieces.
This post will be in two parts. The first will give a very brief overview of celery, the architecture of a celery job queue, and how to setup a celery task, worker, and celery flower interface with docker and docker-compose. Part 2 will go over deployment using docker-swarm.
What is Celery?
Celery is a distributed job queuing system that allows us queue up oodles of tasks, and execute them as we have resources.
From celeryproject.org -
Celery is an asynchronous task queue/job queue based on distributed message passing.It is focused on real-time operation, but supports scheduling as well.
The execution units, called tasks, are executed concurrently on a single or more worker servers using multiprocessing, Eventlet,or gevent. Tasks can execute asynchronously (in the background) or synchronously (wait until ready).
When should I use Celery?
Basically, if you have a bunch of tasks, some or all of them long running, and we want to queue them up, (mostly) forget about them, and have the ability to add new tasks as needed, you want a job queue. If you need a large amount of computing power or concurrency (ability to execute multiple tasks simultaneously) you especially want a job queue.
- Long running tasks you want processed in the background as a part of a web request, uploading files, image conversion, etc.
- Tasks you will execute over (and over and over and over) again with different parameters.
- Updating a machine learning model when new data is received.
Why should I use Docker to build out my Awesomeness?
Docker makes it easy to package up your various concerns, including taking care of package management and getting a message broker up and running with no pain (no small feat!), and get them all talking to each other.
More than that, once you can build a single docker container, you can add an additional layer to your application called a load balancer. Once you have a load balancer, you can deploy multiple instances of INSERT TASK HERE across multiple physical computers, or just on a single computer if that's what you're going for. The point is that setting up your project in docker allows you to scale as needed.
Tell me more...
The best overview I've seen of celery is at this blogpost from vinta.com. For the purposes of completeness I will add some information here too, but these guys have a fantasticexplanation. I highly recommend you go and read it.
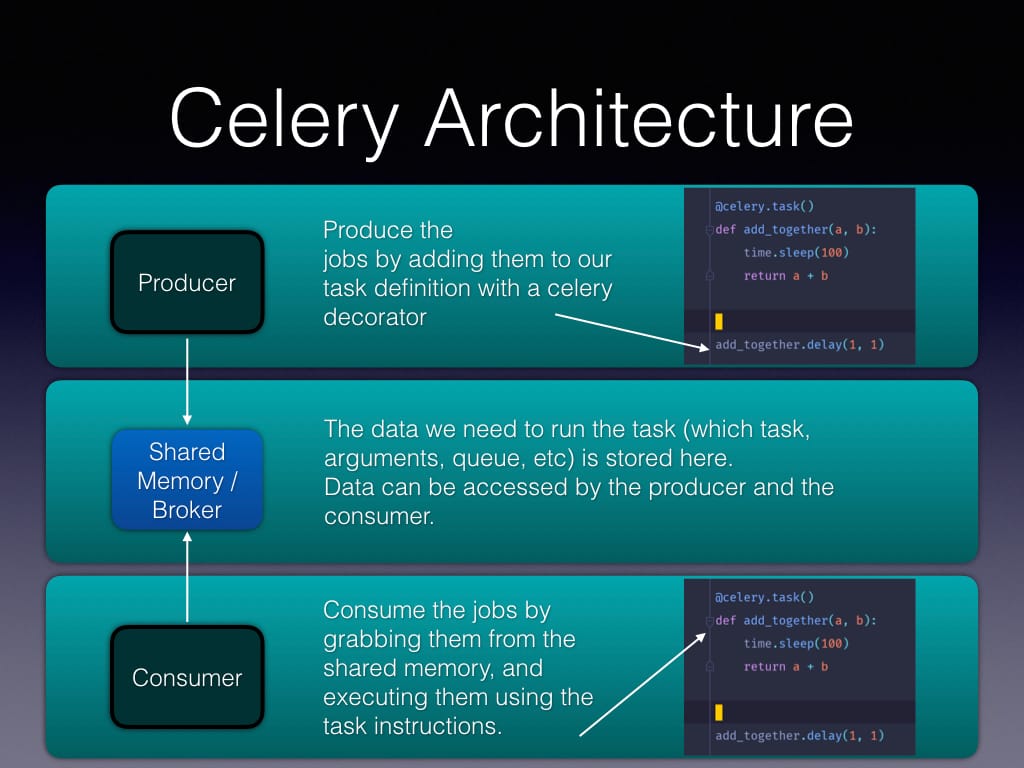
Celery's architecture is not much different from any job queuing system. Underneath the hood they are all using a Producer/Consumer model of getting things done. If you've worked on a tradition High Performance Computing platform (HPC), you've used a Producer/Consumer scheduler, probably SLURM, SGE, or PBS. If you've ever uploaded a large file to a webpage you've probably used a job queue of some sort, possibly Celery, or maybe something else. Pretty much every programming language has some implementation of a job queue. Back in the day I used to use TheSchwartz in perl bioinformatics programs. For my current day node.js programs I have been abusing bull. In a few more years I am sure I will add a few more.
For the sake of this post the different job queuing systems don't matter much. We are talking about Celery here. It's just nice to know that you are learning some transferable skill instead of a technology that will go away in a few months.
Celery Application AddTogether Overview
The rest of this post will concentrate on building and deploying a robust celery job queue with docker. There are 3 major components.
- Task Definitions - what we actually want run. In this case this is our 'add_together' task, but it could be many more.
- Flask Application - receives task arguments, and passes them on over to celery.
- Celery Flower - Our celery dashboard so we know WHAT IS HAPPENING.
We only have 1 task definition, and its kind of lame, but what we're really concentrating on here is the POWER OF DOCKER.
A Minimal Celery Task Example
At a minimum we need to declare a celery instance and a task definition. In this case we are passing our Celery our Flask application instance, and then all of our naming is nice and consistent.
The AddTogether Application
If you checked out the source code you will see I am being a bad, bad software engineer here by not separating out our concerns. I have the task definitions in the same file as the Celery and Flask instance creation in the same file as the endpoints. You should NOT do these things this way in an actual application. In the real world you would have something like task_definitions.py, celery_app.py, flask_app.py, and task_endpoints or something. Refactoring is a very important skill.
With that said, when I am first doing figuring out something that has a million moving pieces I don't want to look in a bunch of files to figure out what is going on. So, for now, this is what's happening.
I have, however, separated out the concerns in the docker-compose file, which is the focus of this post anyways.
The Application Components
The docker-compose file has two main components. First are the components we need for our actual application. These are the Flask Application to define an API to produce the trigger our for tasks, a celery worker to consume execute these tasks, a RabbitMq broker to communicate tasks between the consumer and producer, and a nice flowery interface to tell us how are tasks are moving along.
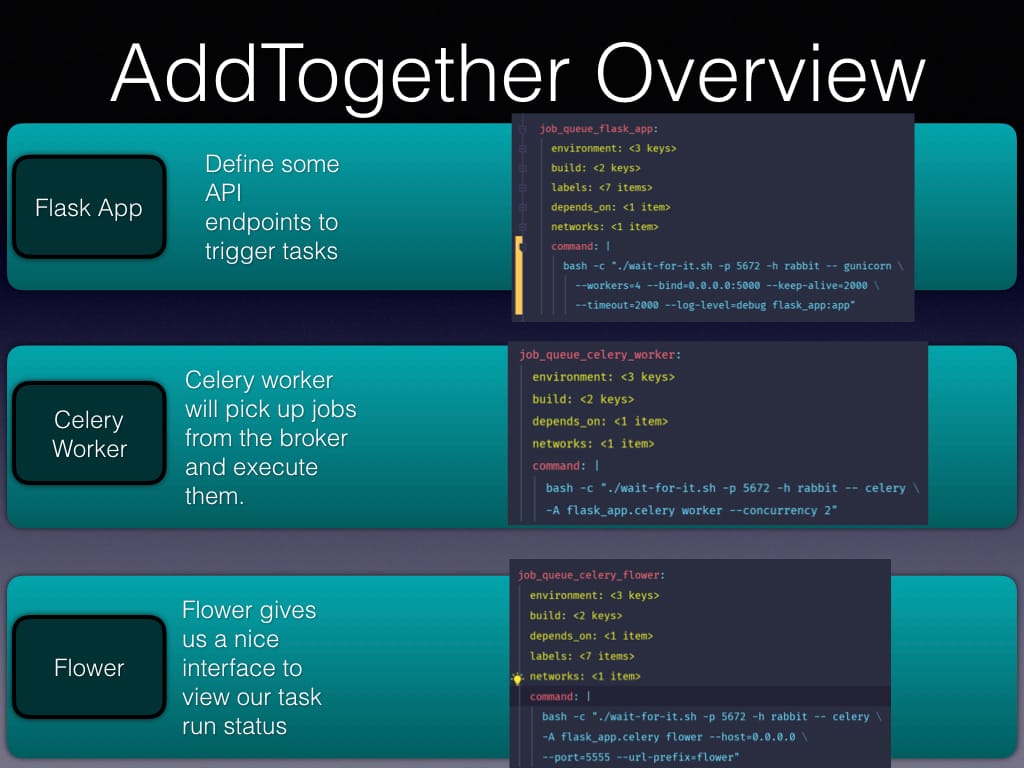
Flask Application
Our flask application is just giving us a REST interface we can use to trigger our celery tasks. That's it. You could add the usual web things like authentication and nice interfaces too.
Celery Worker / Consumer
This is the where the work get's done. You will notice that we have to actually call the celery command line program. This is a pretty common pattern. Depending on the queueing system you may also have an additional scheduler operation.
Celery Flower
Celery Flower gives us a nice web interface for our viewing our task status. It tells us which tasks have run, whether or not they were successful, which are pending, etc.
RabbitMQ Broker
It's not pictured above, but there is also a RabbitMQ message broker. A message broker is very much what it sounds like. Think of any chat app you have ever used. You are subscribed to a certain individuals or groups messages. They send you a message, and you receive it, and vice versa.
The Deployment Components
I'm going to backtrack for just a moment here. In order to understand the next section, you need to understand the relationship between docker, docker-compose, and docker-swarm. Docker is a single service backed by a single container. Docker Compose composes these containers and strings them together so they can talk to one another. Docker Swarm says well ya, but I want to dominate by spreading my composed services out across multiple computers.
What we are doing here is laying the groundwork of our functionality, and then we will use docker swarm to deploy and scale. We will go more in depth deploying with Docker Swarm in Part 2.
Load Balancing and Reverse Proxying with Traefik
If you already looked at the codebase, or scrolled ahead, you may be wondering what on earth is Traefik, and why am I using it. Traefik is a reverse proxy and load balancer. It's amazing, and it has CHANGED MY LIFE. No, really, I constantly screwed up reverse proxies in NGINX. Typing without typos is hard work!
What does this mean in practical terms? This means that instead of using urls with ports in them, as in localhost:5000, I can instead use actually informative urls, such as localhost/api. These are done through Traefik labels. Even cooler, I can use Traefik as a load balancer. This means that I can deploy multiple instances of the same web service, all using the same url, and Traefik takes care of ensuring the traffic (GET IT?) is balanced between the instances. Shameless self promotion here. I wrote a blog post that gets more into the nitty gritty of Traefik and proxy passes here.
If you want to find out more about load balancing docker applications in particular I really recommend this blog post on load balancing a Node.js application. It uses HaProxy instead of Traefik, but it's the same concepts.
The Final Docker Compose
With all that said, here is (finally) the docker-compose configuration.
| version: '3' |
view rawdeploy-celery-queue-docker-compose.yml hosted with

by GitHub
Distribute all the Things!
Bring up the Celery Queue
You too can bring up your own job queue, on your local computer. If this is the first time you are running this command, it may take awhile to build. Just cd into the directory and :
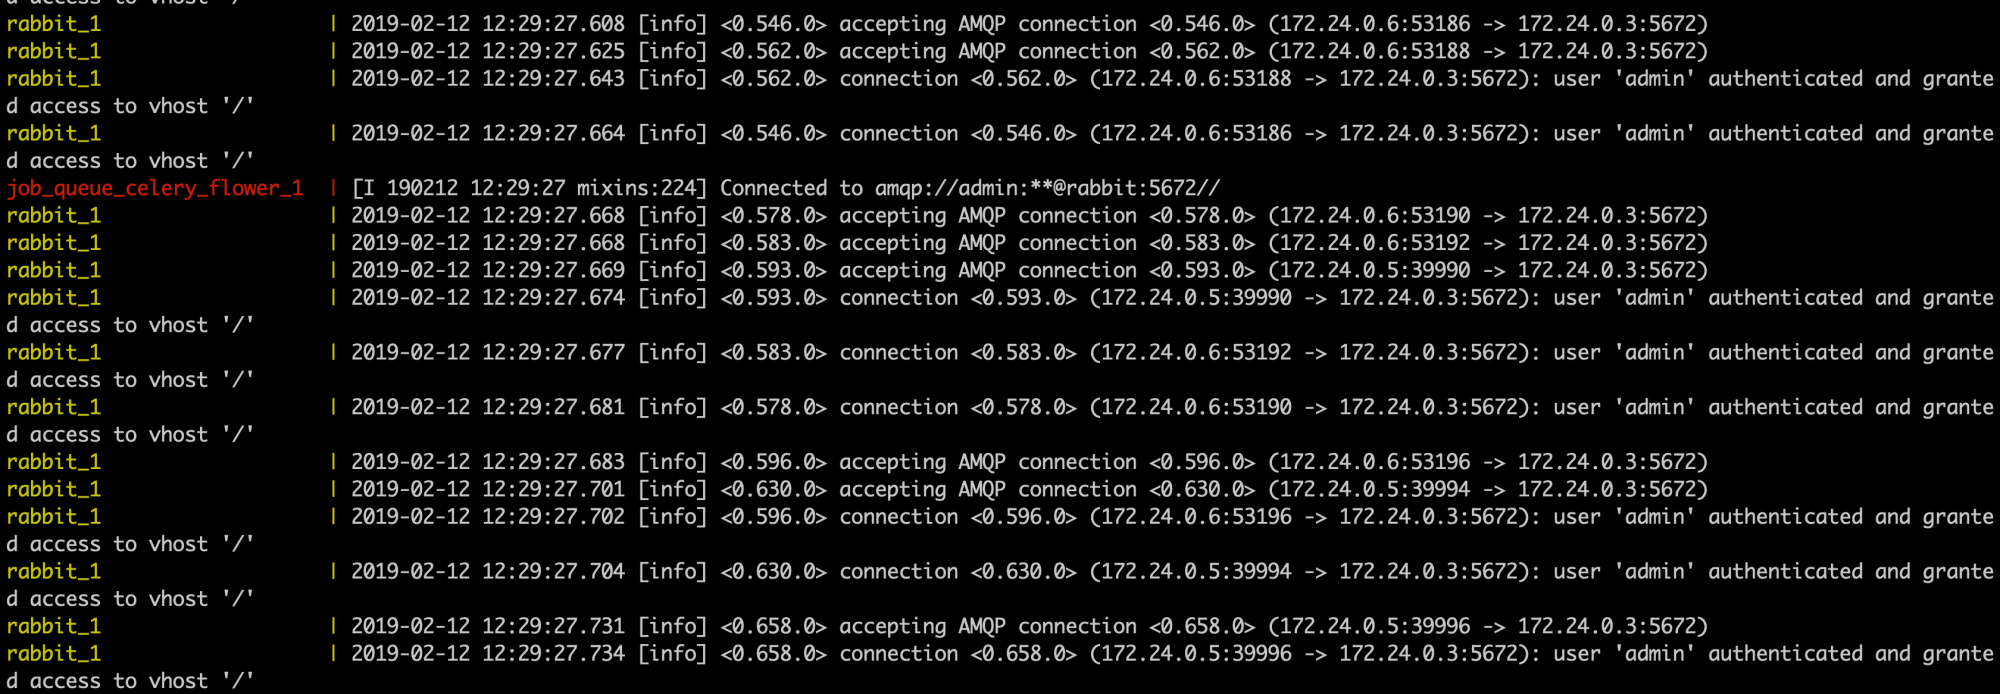
docker-compose up
You should see status updates from the flask app, the worker, flower, rabbitmq, and the traefik. You can't see it all here, because its long,but you should have a lots of status updates.
Test out the Functionality
Is the flask application up and running?
I always add a simple health endpoint to each of my web projects for ease of use that just returns whatever it is given. You should see something to the effect of "hello world" when you run this command.
curl -X POST \
    http://localhost/api/health \
    -H 'Cache-Control: no-cache' \
    -H 'Content-Type: application/json' \
    -d '{"hello": "world"}'
Bash
Copy
Add a task instance to AddTogether
Now, lets add in a job for our add_together task! If you like Postman, bring it on up here. If you don't know what postman is, just follow the curl command.
 curl -X POST \
    http://localhost/api/add_together \
    -H 'Cache-Control: no-cache' \
    -H 'Content-Type: application/json' \
    -d '{"x1": 1, "x2": 2}'
There you go! It sends back the context along with a confirmation that it was sent. YAY! Now, this task was run in the background, so we don't know yet if it was successful or even if it executed yet. For that we need to check out the Celery Flower UI.
How is our AddTogether task instance Doing?
Let's view the task instance we generated from the flask api in the Celery Flower UI. Type http://localhost/flower in your url, and it will bring up the flower interface.
Wrap Up
That's it! We identified the key components of our Celery job queue, spun them all up using docker, made pretty urls (and potentially load balancing) in traefik, shot off some tasks, and viewed them in the Celery Flower UI. I hope this was helpful!